
Nowadays we are constantly bombarded with ads, articles, and videos talking about online privacy. While they can be annoying sometimes, they should definitely not be ignored. That’s because privacy and security are very real concerns in the digital and they’re something you’ll want to take into consideration as well.
From VPNs to secure Linux distros designed with anonymity in mind, there are many ways to protect yourself while browsing the internet. And many reasons why you should protect your browsing data while doing so.
Using proxies is another powerful solution for increasing your security, though it’s generally not as popular among regular users because proxies are seen as difficult to configure and manage. Luckily, you can avoid most of the hassle by simply using FoxyProxy.
FoxyProxy is a neat plugin for Chrome and Firefox that makes it simple to configure browsers to access proxy servers. One of the most intimidating things about working with proxies is the fact that you have to configure them on a system level, which means messing around with Windows settings.
The instructions on how to do that aren’t necessarily complicated but I think most of us would rather avoid changing Windows settings unless absolutely necessary.
With FoxyProxy you don’t have to worry about any of that because the plugin works on a browser level. The plugin works best with residential proxies but does support other types of proxies as well.
With all that out of the way, let’s take a look at how to set up FoxyProxy with the two most popular browsers out there.
How to Set Up FoxyProxy on Google Chrome
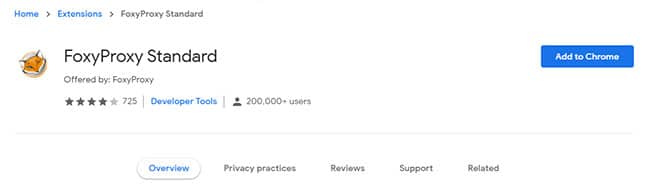
Start by visiting the Chrome Web Store and then go to the Extensions section. Type FoxyProxy in the search box and you should see three different results pop up – FoxyProxy Basic, FoxyProxy Standard, and FoxyProxy GeoShift. Click the Standard version and add the extension to your browser.
Once installed, click on the little icon in the upper-right menu and then click Options. This will open up a new window.

In the new window, click Add New Proxy to open up the settings menu. This menu may look a bit intimidating if you’re not used to configuring things manually but don’t worry because it’s actually very simple to work with.

First off, make sure the option labeled Manual Proxy Configuration is enabled. Next, you’ll need to type in the IP address of the website or server you want to access along with the port number. Make sure to also check the SOCKS (socket secure) Proxy option if you happen to be using one.
Don’t hesitate to contact your proxies provider if you’re not sure about some of the required information. You’ll probably also want to make use of the Save Login Credentials option, just so you don’t have to type everything manually each time.
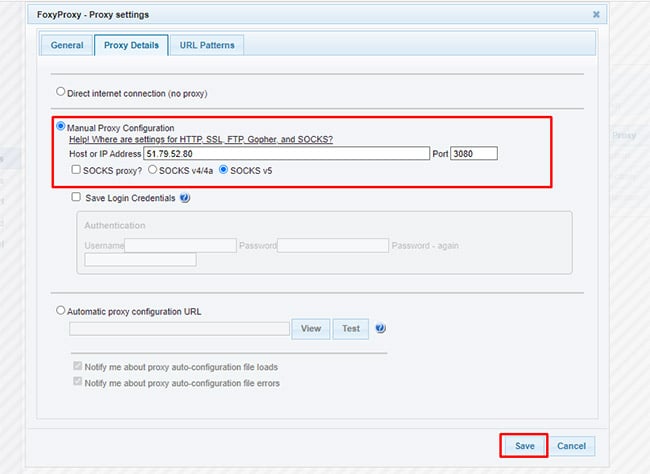
Before you save and test to see if everything works properly you may want to switch over to the General tab to name your proxy. This will come in handy if you plan on using more than one of them. FoxyProxy also has a third tab that allows you to configure URL Patterns. The options here are designed for advanced users and come in handy if you want to create a pattern of IPs to blacklist or whitelist.
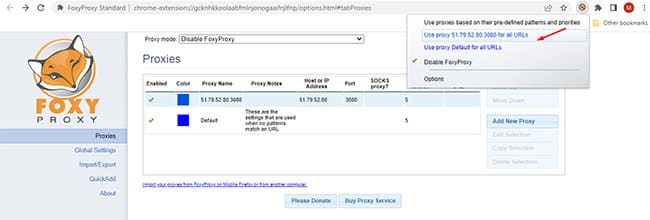
Once you have finished configuring FoxyProxy hit Save. Click the extension icon and then click on the name of the new proxy profile you just created. All your internet traffic should now be rerouted through that connection. You can visit a site like WhatIsMyIp to make sure that everything works as intended.
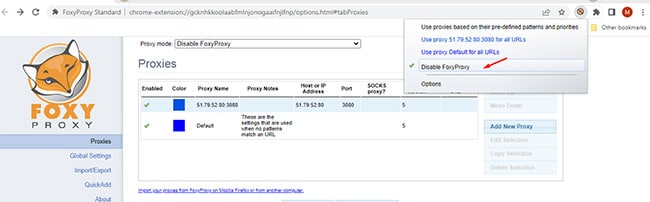
Now, whenever you’re done with the proxy you can once again click on the extension in the menu and then press the ‘Disable FroxyProxy’ option as seen in the screenshot below. That will disconnect you from the IP you configured and allow you to get back on the network’s IP.
How to Set Up FoxyProxy on Mozilla Firefox
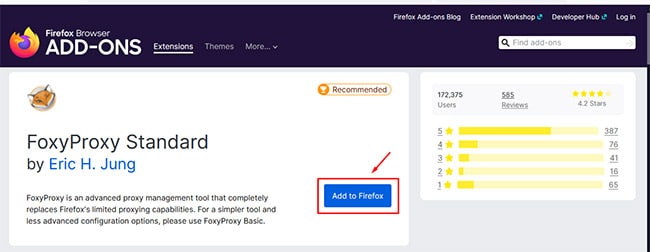
If you’re looking to set up FoxyProxy on Mozilla Firefox the process is very similar to the one we just described, however, there are a couple of differences. Start by going to the add-ons store and typing in FoxyProxy. You will see a number of results but the one we need once again is FoxyProxy Standard.
Click the extension icon and then click Options.
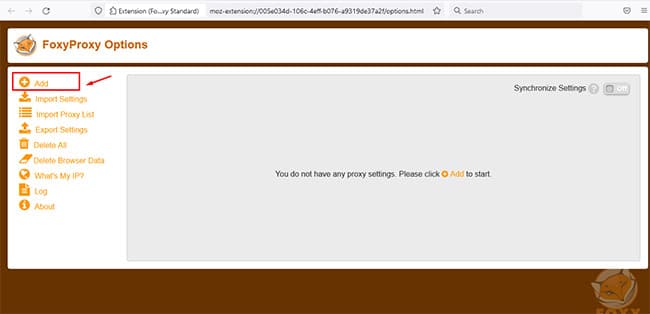
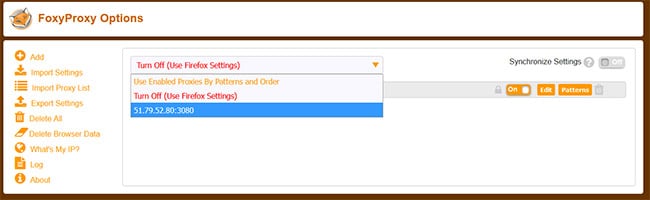
You’ll notice that the Firefox version looks quite different and has a few additional options. Click Add to set up a new proxy.
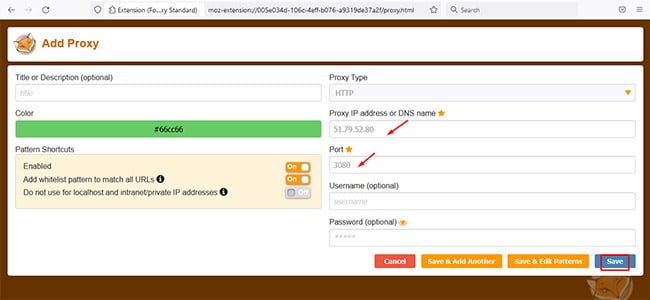
Unlike the Chrome version, the Firefox version of the extension has all the options in one place, so no need to switch between different tabs. You can use this window to fill in your log-in credentials, proxy name, IP, and type, as well as create pattern shortcuts. You can also create multiple profiles without having to go back to the main UI window every single time. Once everything looks good save your settings.
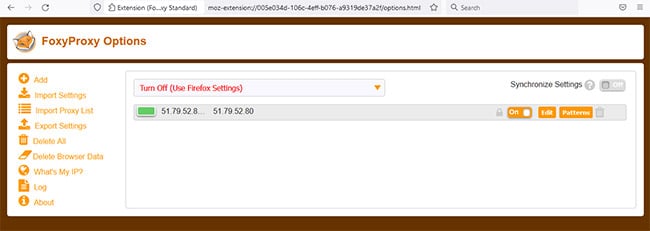
Click the browser extension icon and select the profile you just created. FoxyProxy has an integrated button for checking your IP on Mozilla so don’t hesitate to use it to make sure everything works as intended.
What is FoxyProxy?
FoxyProxy is an extension for Google Chrome and Mozilla Firefox that allows you easily create and configure proxy connections. The extension offers a variety of neat features, including auto-switching, data import and export, online rule lists, event handling, and more.
In addition to the free extension, FoxyProxy also offers proxy and VPN services that use a subscription-based payment model. Prices for these services start at $9.99/mo but you can use the coupon code blackdown_froxy_30 for a 30% discount.
What Benefits Does FoxyProxy Offer?
Arguably the biggest benefit offered by this extension is convenience. Configuring proxies using traditional methods can be quite time-consuming and tedious. With FoxyProxy you don’t have to worry about that because the extension streamlines the process and allows you to configure everything with ease.
The ability to automatically switch proxies and create rulesets is not to be overlooked either, especially if you find yourself having to use different proxies for different websites.
What Do I Need to Know When Using FoxyProxy?
Just because you’re using FoxyProxy doesn’t mean your online activity is completely untraceable. This applies not just to proxies but to any other form of security-focused tool or service. Staying safe online is generally a matter of common sense more than anything else.
This means using not just one but a variety of tools, including password managers, antimalware software, and proxies, to enhance your security. FoxyProxy alone can help keep you safe but it all depends on what you’re planning to use it for, as some online activities are easier to trace than others even if you do have a proxy or a VPN.
Final Thoughts
FoxyProxy is a game-changer for anyone who is struggling with setting up and managing proxies. Similar to a lot of other software, the extension does have a slight learning curve but it’s still one of the best and simplest solutions for configuring proxies we’ve seen so far.
While the Chrome version is more popular, we find the Firefox variant to be the better of the two just because it gives you all the options in one place and comes with an integrated button for looking up IP addresses. But regardless of which version you’re thinking about using, we highly recommend FoxyProxy to anyone who wants to enhance their online security in a simple yet very effective way.