You have completed the installation process, and you are ready to start using Linux. If you want the operating system to execute your requests, you need to know how to issue commands properly.
Linux has become more user-friendly lately, which is why its distros have a graphical user interface – GUI. However, the command line interface remains the essence of Linux. If you are using Ubuntu, you can access it by pressing Ctrl + Alt + T. We won’t tell you the graphical path to the terminal as this way is far more exciting!
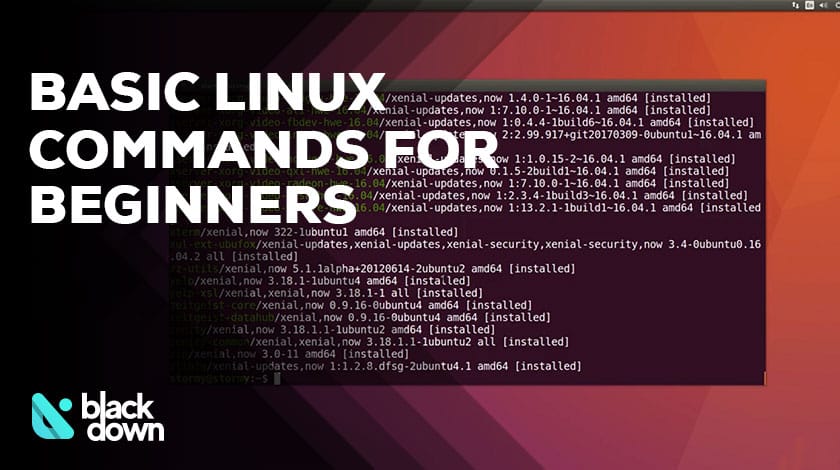
Okay, no more jokes, let’s get serious and focus on the basic Linux commands every beginner should know. These are the commands you will need at every point of working with this OS, so make sure to memorize as much as possible or keep returning to this article when you need a reminder.
1. Know Where You Are
The first thing you want to know is the current folder you are in. To do that, you should use the simple “pwd” command. Linux will immediately show your current location, and you can use this starting position to navigate to sub or parent directories.
Usually, terminals already show you your current path but this is useful if you want to see the whole absolute path.
pwd
2. Show Directory Contents
If you want to see the contents of the directory you are working in, go ahead and use the “ls” command.
ls
You can make this command more advanced if you want to see the contents of another folder. For example, to see the contents of that folder type:
ls /usr/local/share
Feel free to type the path to any other directory and Linux will list its contents as long as the folder exists.
3. Move Between Folders
Once you establish your starting position with the “pwd” command, you might want to move to another directory. That is another basic Linux command known as “cd.”
It looks like this:
cd usr/local/share
If you want to confirm that you have successfully moved to that directory use the “pwd” command to double-check.
The cool thing about the “cd” function is that it allows you to use shortcuts. You can type only “cd” to go to the Home folder. Use “cd –” if you want to return to the previous directory you were working in, and “cd ..” to go one folder up.
4. Take a Quick Look at the File Contents
If you want to check the contents of a file, you can print them on the screen if you utilize the “cat” function. It is a huge timesaver if you are looking for particular information and you are not sure where to find it.
All that you should do is to type:
cat filename.extension
The system will show you how the file looks on the screen. Note that you can go to a file that is not in your current folder by specifying the full path:
cat ~/pathToFile/filename.extension
5. Rename Files and Folders
Do you want to change the name of a file or a directory? The easiest way to do that is to use the “mv” function. Type in the following:
mv current_name desired_name
To be certain you are in the right folder, you can always use the “ls” command before the “mv” one. An important thing to note is that you should add the right file extension so that everything goes smoothly. In case Linux denies you the permission of renaming the file, you can add the “sudo” command in front of “mv.”
It looks like this:
sudo mv current_name desired_name
You can also move any file with this command. Use the following line:
mv filename desired_new_location
If necessary, utilize the “sudo” command again to grant the super user permission.
6. Copy Files and Folders
The next in line of the basic Linux commands you will learn it is related to the copy function. Here is the line you should use to copy a file:
cp file_location file_destination
cd file_destination
ls
The same command applies if you are copying a folder. You can use the “cd” function to move to the destination folder and then the “ls” line to check if the copying process was successful.
7. How to Delete Files
Instead of delete, the Linux users prefer the term “remove.” If you want to remove a file or directory, you need to issue the “rm” command. Here is how to that:
rm -r file_or_folder_name
Should we tell you that you need to double-check before you remove a file? You never know when you might need, so make sure you are completely sure that removing it is the right choice.
8. Create and Delete Folders
If you need a new directory to store files in Linux, it is simple to create them with the “mkdir” command. It looks like this:
mkdir desired_folder_name
That will create a new directory, but what happens when you want to delete a folder? In those situations, you use the “rmdir” line:
rmdir folder_location
Make sure that you chose the right path before removing a folder as you do not want to lose important data.
9. Create Blank Files
If you ask us, “touch” is one of the most intriguing and useful basic Linux commands. It allows you to create blank files of any type. Use the following:
touch path/filename.extension
That will create a new empty text document in the set destination. Keep in mind that you can also create other files, such as .html ones. If you want to edit them easily you can always use Sublime as your primary text editor.
10. Grant SuperUser Permission
We already mentioned the “sudo” command when we discussed renaming and moving files. However, it is necessary to mention it once again as it is an excellent way to avoid problems when executing commands.
If Linux reports that you do not have permission or authorization to perform a particular action, use “sudo” to solve your problems.
sudo the_desired_command
That will tell Linux to execute the line with superuser permission, which means there will be no issues with authorization.
11. Linking Directories and Files
Are you ready for the things to get a bit more complicated? Linux has a great “ln” command” that allows you to link directories and files.
Check out how it should look:
ln -s /var/www/ /tmp
That will make a link between the “var/www” and “tmp.”
Now, if you want to unlink that connection, you should type:
unlink /tmp/www
Ln is a very useful command if you know how to use it, but make sure you are very careful when doing the linking.
12. Get a Preview of the File
The “head” function works for commanding Linux to print the first ten lines of a particular file on the screen. The big advantage of this command is that it works for any file type.
For example:
head /log/syslog/
If you type this and press enter, you will get the initial ten lines of the syslog file. It doesn’t have to be ten lines if you use the following:
head -30 /log/syslog
That way you will get the first 30 lines, but you can also substitute 30 with any other number.
See How the File Ends
In some cases, you want to see the last ten lines of a file. That is when you should use the “tail” function. In essence, it does the same as the “head” command, except it shows you the last lines of any file.
tail -10 /var/syslog
As we mentioned before, you can change the “10” for the desired number of lines you want to see.
13. Adjusting File and Folder Permissions
There is a good reason why this is a vital command as it decides who will have reading, writing, and executing permissions on a particular file or folder. We suggest you learn a thing or two about file permissions before typing in this command.
Once you know what you are doing, use the following line:
chmod XXX file_or_folder_name
The “XXX” marks the desired permission you want to set.
There is also a command that makes a particular script executable and makes working in Linux easier. Here is how it looks:
chmod +x name_of_the_script
14. Has Someone Tempered with My File?
The md5sum command allows you to see if anyone messed with a particular file. For example, you can use it to identify the ISO file’s checksum:
md5sum path_to_the_ISO
You will receive a string of characters and numbers, which is the md5 hash of the scanned ISO. If the characters match, everything is okay.
15. Search for a File
If you are unsure where you saved a particular file, you can search for it with the “locate” command. However, you need a database to perform this command successfully. That is why you want to create the database first:
sudo updatedb
It will take a few minutes for Linux to create the database.
Once that happens, go ahead and type:
locate -i *filename*
The reason why we added the “-i” part is to ignore lower and upper cases. If you want to include that parameter into the search, execute the “locate” command without that additional part.
16. Check Disk Space Usage
Do you want to know how much space the Linux system uses on your disk? You can check that by typing these several letters:
df -h
Alternatively, you can also inspect the disk space usage of a particular folder or file, except the command you should use for this is this:
du -sh file_or_folder_path
Let’s upgrade your knowledge and tell you that “-sh” makes the results readable for humans and suppresses redundant clutter.
17. Check Your RAM
As for inspecting your RAM, you can do so with the free command.
Type the following and press Enter:
free -h
You will now get information on how many used RAM, and available memory is there in the system. And yes, the “-h” flag will make the results easier to read.
18. Zip Your Files
Zipping files is an excellent way to save some space. Linux supports creating and extracting zip archives, but you will need to install them. Some other OSs might have these commands pre-installed, but Ubuntu doesn’t. Fortunately, you can solve that by typing the following:
sudo apt-get install zip unzip
Once you installed the commands, use the “zip” one to create an archive.
zip -9r desired_name.zip file_1 folder_1
That will zip “file_1” and “folder_1” in a zip archive called “desired_name.zip.” If you want maximum compression and recursive archiving, use the “-9r” flag.
If you need to extract files from a zip archive, you can use the unzip command.
unzip desired_name.zip -d desired_path
If you do not choose the preferred path, the system will extract everything into the current working folder.
19. Discover Basic Information about the System
If you want to show all the basic data about your system, including but not limited to kernel version, system time, and hostname, you can do so by issuing the following command:
uname -a
That way you will get the maximum amount of information Linux can provide.
20. Learn More about Various Commands
If you want to know more about a particular command, and what it can do, the system will provide the necessary information.
You need to type the following:
man command_name
For example, if you type “man chmod” the system will give you an overview of the command used to adjust user permissions.
BONUS: Find Out What You Did Wrong
If you are a beginner, not many commands will be as useful as the “history” function. Type those letters and press enter and Linux will show you the list of the commands you previously issued. In case you encounter a problem, that may be helpful to find out what you did wrong.
history
THE END: Shutdown Your System
The last in the line of our basic Linux commands will teach you how to reboot or shutdown Linux from your command line.
Using “shutdown -h now” will immediately turn off the system, but you can also use a delayed shutdown. Type “shutdown -h +60” where “60” stands for the number of minutes. If you execute this command, make sure you don’t forget it because the system won’t!
shutdown -h now

shutdown -h +60” where “60
Additionally, you can use a simple “reboot” command to restart the computer instantly. There is an option to postpone the reboot, too. All you need to do is to add “+60” like in the “shutdown” command.
reboot