Let’s face it – Terminal is a powerful tool for managing files on macOS. But what about using it to recover deleted data? Say you accidentally deleted an important file, can Terminal bring it back? The short answer is yes, sometimes. But there are a few catches. In this article, we’ll explain when you can recover deleted files from Mac with Terminal, the limitations you need to know about, and when it’s better to use another recovery method. Keep reading, and you’ll get the complete picture of how (and when) to use Terminal for data recovery.
How to Use the Terminal to Recover Deleted Files on MacOS
If you’re asking how to recover data using Terminal, chances are you already know what it is and how it operates. So let’s cut to the chase – while there are many methods to recover deleted files on Mac, Terminal can only help recover deleted files in two specific scenarios: if the files are still in the Trash or if you have a Time Machine backup.
If your case doesn’t fall into either of these, you’ll need to use more advanced data recovery methods, which we’ll cover later in the article. For now, let’s walk through how to use Terminal if your situation matches one of the above. Stick around for the exact commands and steps you’ll need.
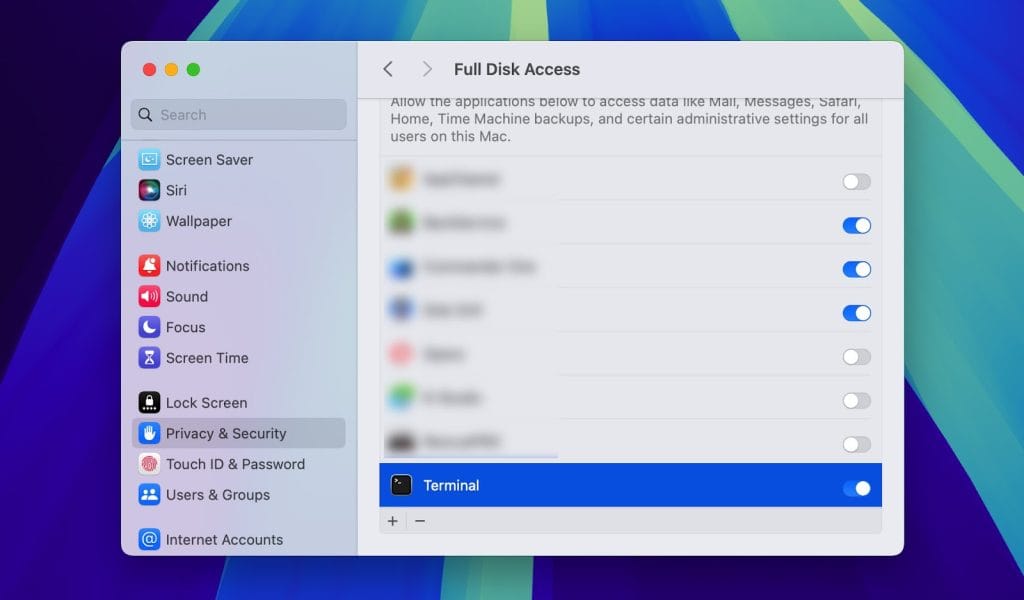
Pay attention: Before we proceed with the steps for each method, make sure Terminal has Full Disk Access on your Mac. To do this, open your Mac System Settings > Privacy & Security > Full Disk Access > toggle Terminal on to give it full access.
Method 1: Recover Recently Deleted Files from the Trash
If you deleted a file and it’s still in the Trash, you can use Terminal to bring it back. It works like the “Put Back” option you’d click in the Trash, just done through a command line.
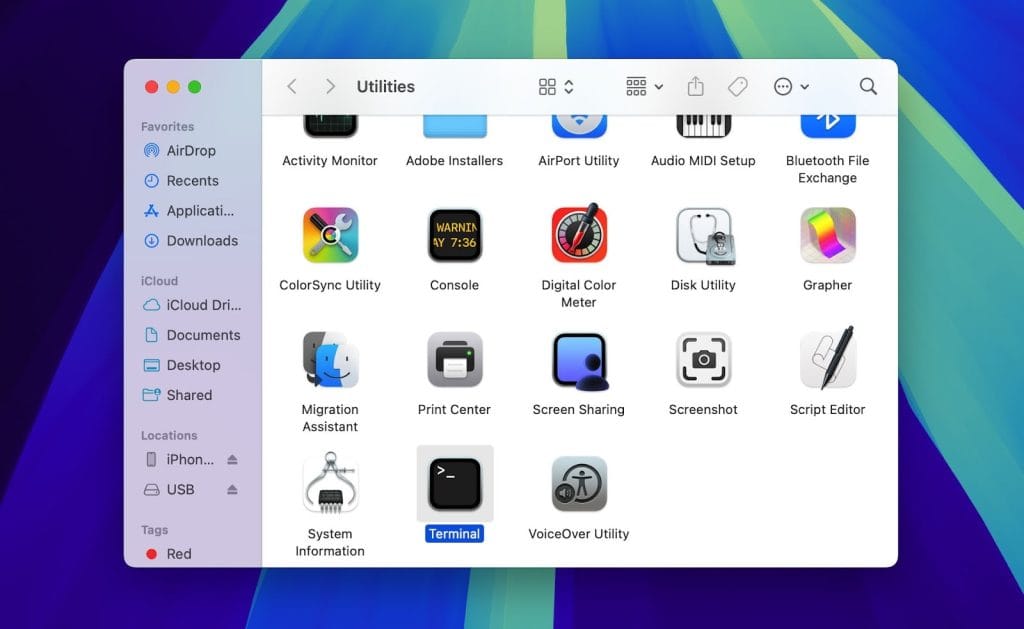
- Go to Utilities > Terminal to open it.
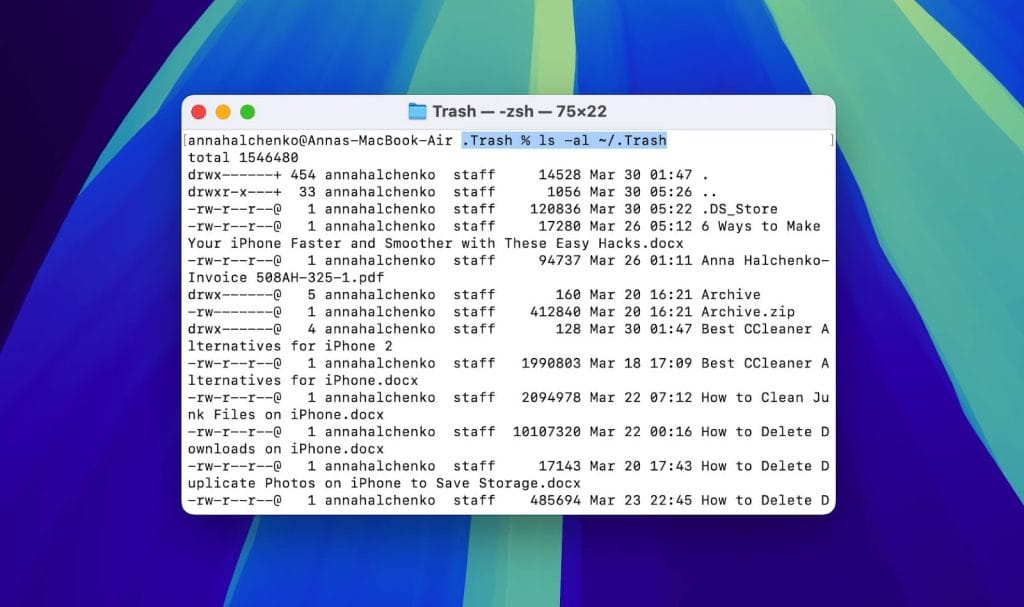
- In the Terminal window, type cd ~/.Trash and press Enter(Return) to switch to the Trash folder.
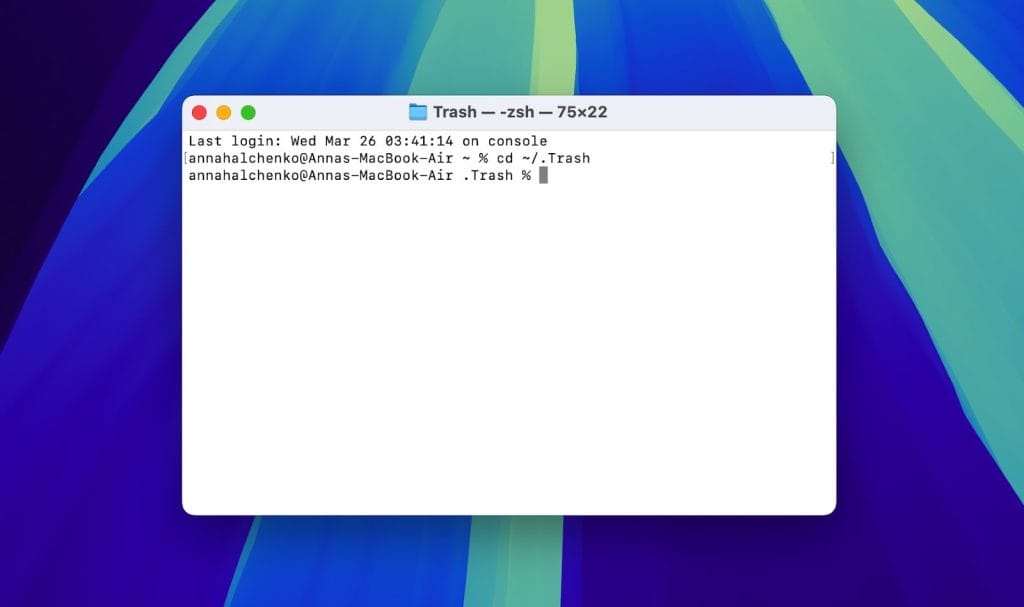
- To see what’s in there, type ls -al ~/.Trash and press Enter(Return). This shows a list of everything currently in your Trash.
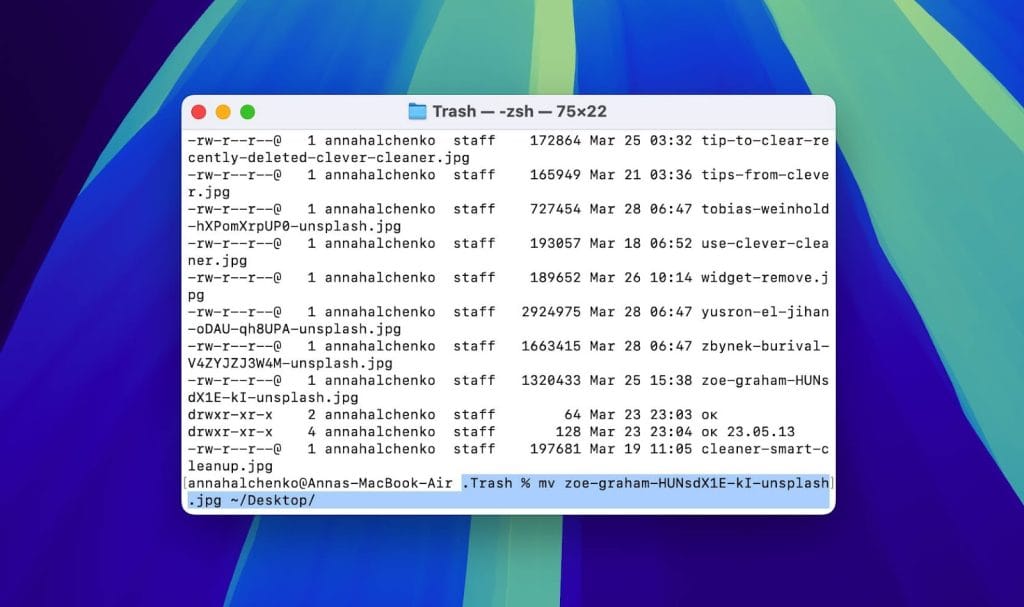
- To move a file back to its original location, use the mv command. For example, to restore a file named example.jpg to your Desktop, type mv example.jpg ~/Desktop/ and hit Enter(Return).
You can use pretty much the same method to recover deleted files from an external drive plugged into your Mac. To do this, open Terminal > type cd /Volumes/[ExternalDriveName]/.Trashes > list files with ls -al > and move the desired file with mv [filename] ~/[destination]/.
Method 2: Retrieve Files from a Time Machine Backup Using Terminal
You can also use the terminal to recover the emptied Trash on your Mac or files that were deleted using a method that bypasses it, but this is possible only if you had configured Time Machine to backup your system before the file was deleted and have a reliable backup containing all the necessary data.
- First, confirm that Time Machine was active and properly configured before the file deletion.
- Access Terminal through Applications > Utilities > Terminal.
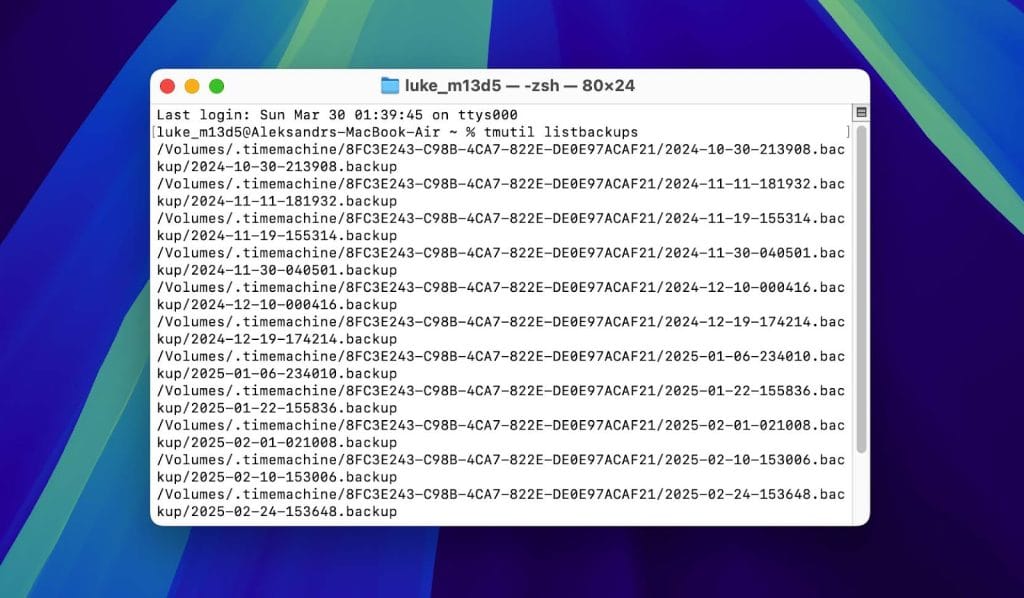
- Enter tmutil listbackups in the Terminal to display a list of available backups. This will show you all the snapshots you can restore from.
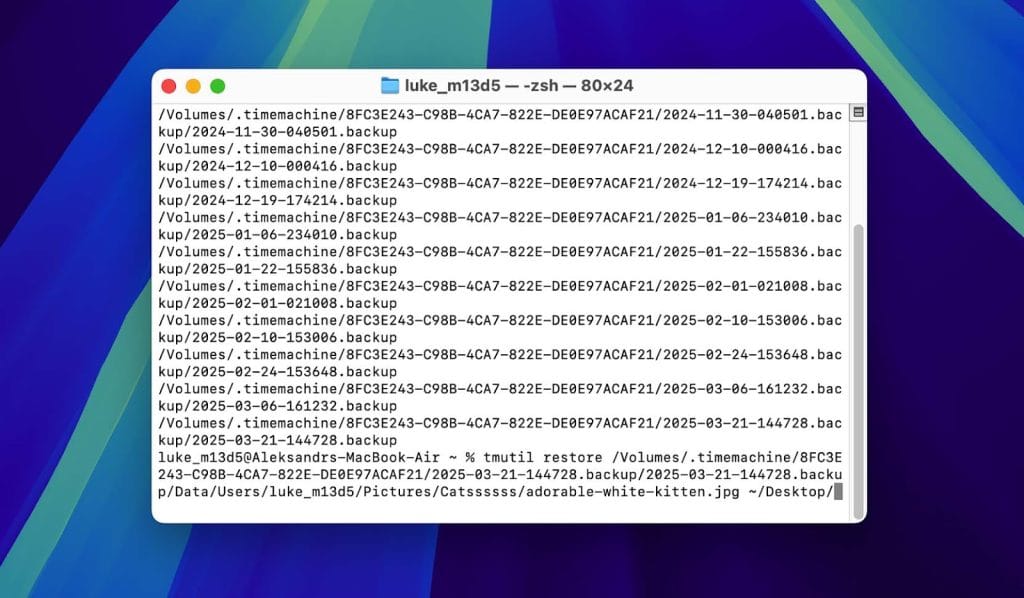
- Identify and select the appropriate backup from which you need to recover files.
- Use the tmutil restore command to retrieve your files. For example, to restore a file named importantimage.jpg from a backup, type tmutil restore ‘/path/to/backup/importantimage.jpg’ ‘~ /path/to/destination/‘ and press Enter.
But what if the files you need aren’t in the Trash, and you didn’t set up Time Machine backups? Unfortunately, in this case, recovering files permanently deleted from your Mac using Terminal is impossible. Your only option would be to use specialized data recovery software that can scan your drive and restore files from any leftover traces in the system.
Two Alternatives to Recovering Data on a Mac via Terminal
To make this guide as complete as possible, we didn’t want to leave you hanging when it comes to recovering permanently deleted files from your Mac. That’s why we’ve included two data recovery tools that can help. One works through Terminal, and the other uses a graphical interface, perfect if you realize Terminal isn’t really your thing.
Pay attention: Even data recovery software cannot guarantee a 100% success rate. Your best chance to retrieve your files is to act quickly – use the recovery tool as soon as possible after you delete the data. The longer you wait, the higher the chance that new data overwrites the deleted files, which makes them much harder (or impossible) to recover.
Alternative 1: Use Command-Line Data Recovery Software
Since this article concentrates on recovering data using Terminal, let’s start with a tool that actually runs in Terminal – PhotoRec. It’s a free, open-source program that’s known for being pretty powerful when it comes to pulling back lost files.
That said, there are a few things you should know upfront. PhotoRec can’t recover deleted files from system drives on Macs with M1- M4 or T2 chips due to Apple’s security restrictions. Also, it uses a signature-based scan, which means it won’t keep your original file names or folder structure when recovering files.
- If you do not have Homebrew installed on your Mac, open Terminal and enter the following command: /bin/bash -c “$(curl -fsSL https://raw.githubusercontent.com/Homebrew/install/HEAD/install.sh)”. This script downloads and installs Homebrew on your system.
- Once Homebrew is ready, install PhotoRec by typing: brew install testdisk. This command installs TestDisk, which includes PhotoRec.
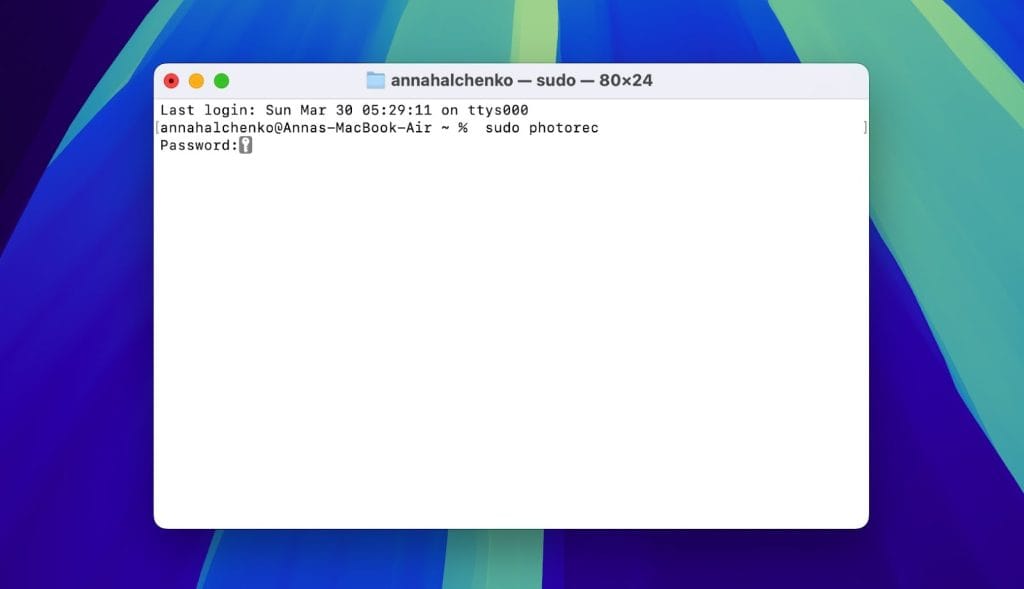
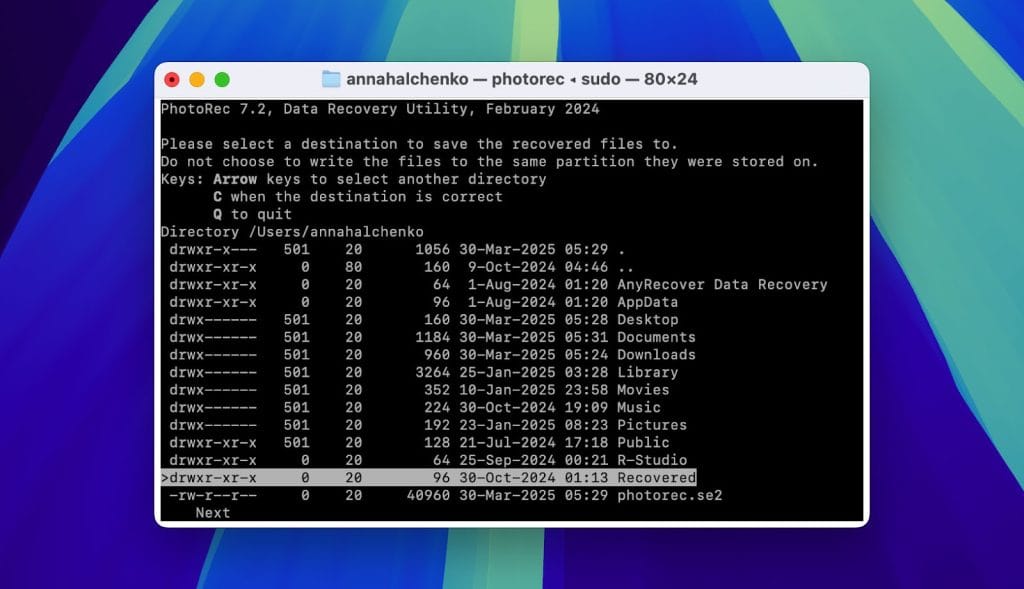
- To start PhotoRec, type sudo photorec. Enter your administrator password when prompted. This grants PhotoRec the necessary permissions to access and scan drives.
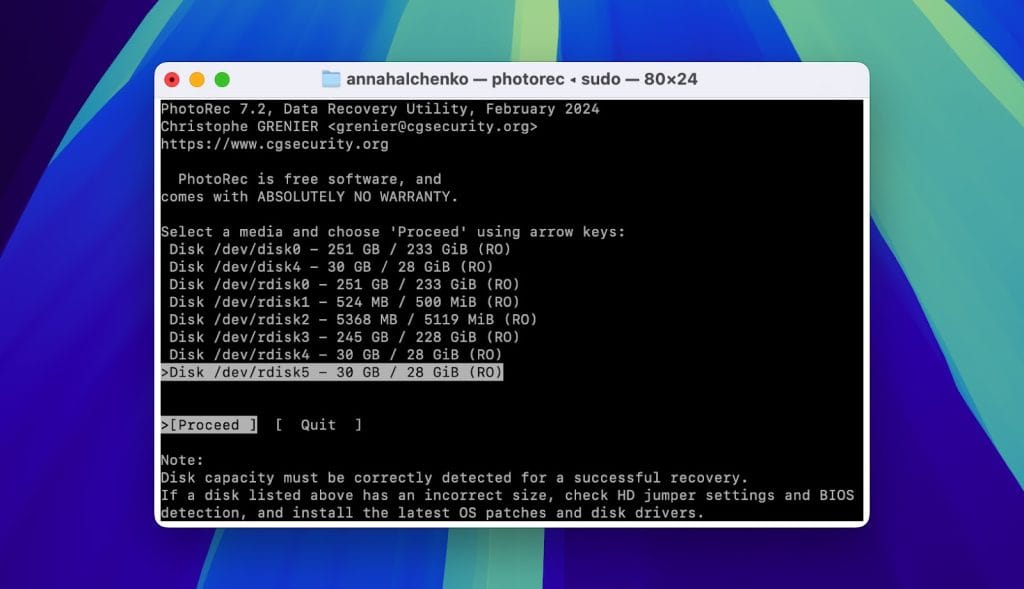
- PhotoRec will display a list of available drives. Use the arrow keys to select the drive from which you want to recover files and press Enter.
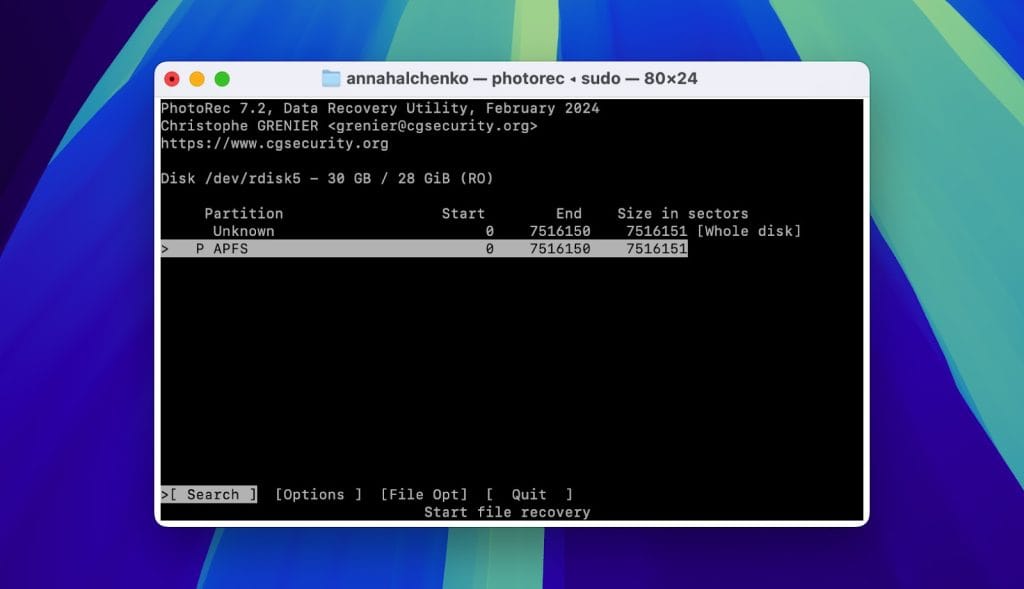
- PhotoRec will ask you to specify the partition table type. Use the arrow keys to select the correct partition table type and press Enter. If unsure, select ‘Unknown’ to scan the entire drive.
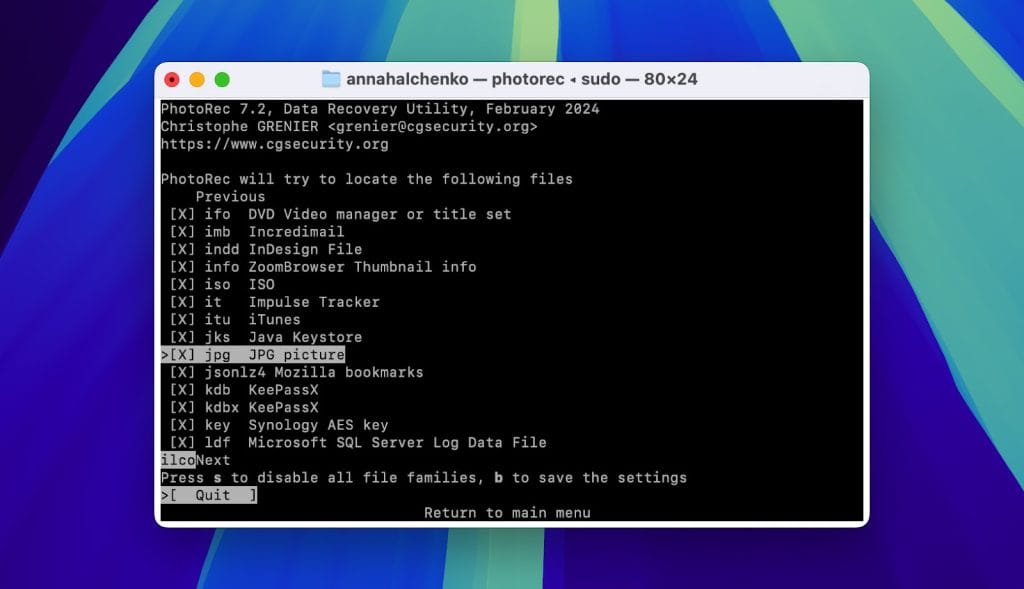
- PhotoRec allows you to specify which types of files to recover. Select the file types you wish to recover, or choose to recover all if you are unsure.
- Choose a destination folder for the recovered files. Confirm this location is on a different drive to avoid overwriting data.
- After you set the parameters, start the scanning process. PhotoRec will recover files to the specified destination folder.

Alternative 2: Use Data Recovery Software with a GUI
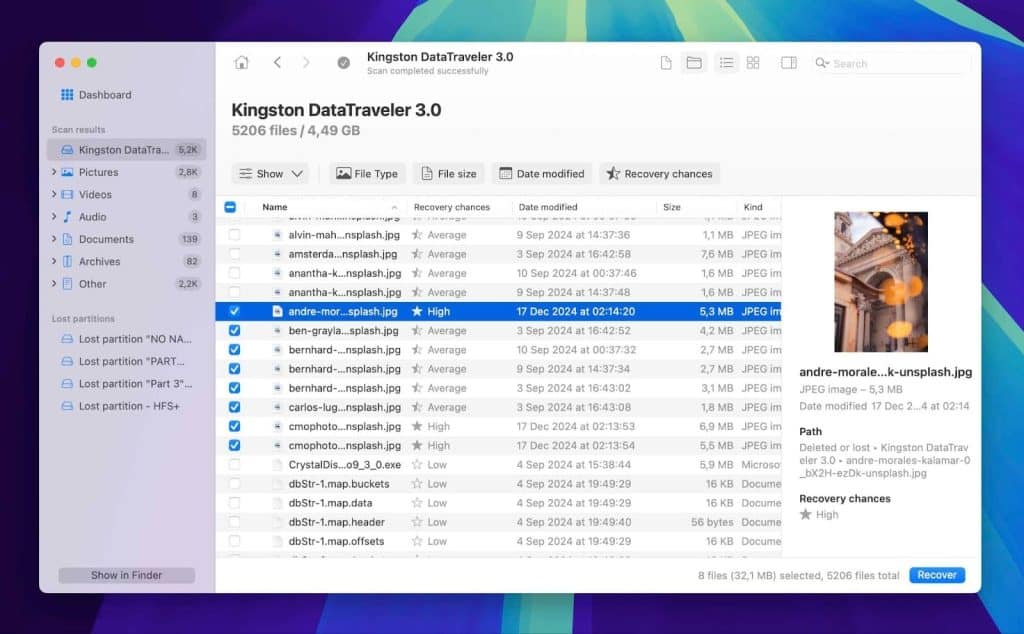
If you find that using Terminal isn’t your thing, you might want to try data recovery software with a graphical interface instead. One solid option is Disk Drill. It’s especially useful because it can scan and recover files from Macs with T2 and M1–M4 chips, something many other tools can’t handle. One of the best features of Disk Drill is file preview. So whether it’s an image, a document, or something else, you can check the contents first and choose to recover only that specific file, no need to bring back a bunch of similar files you don’t actually need.
However, keep in mind that while you can download the software for free, run a scan, and preview the recoverable files, you’ll need to upgrade to the pro version to actually restore them to your Mac.
- Go to the official website of Disk Drill and download the software. To prevent data overwriting, install it on a drive other than the one you intend to recover data from.
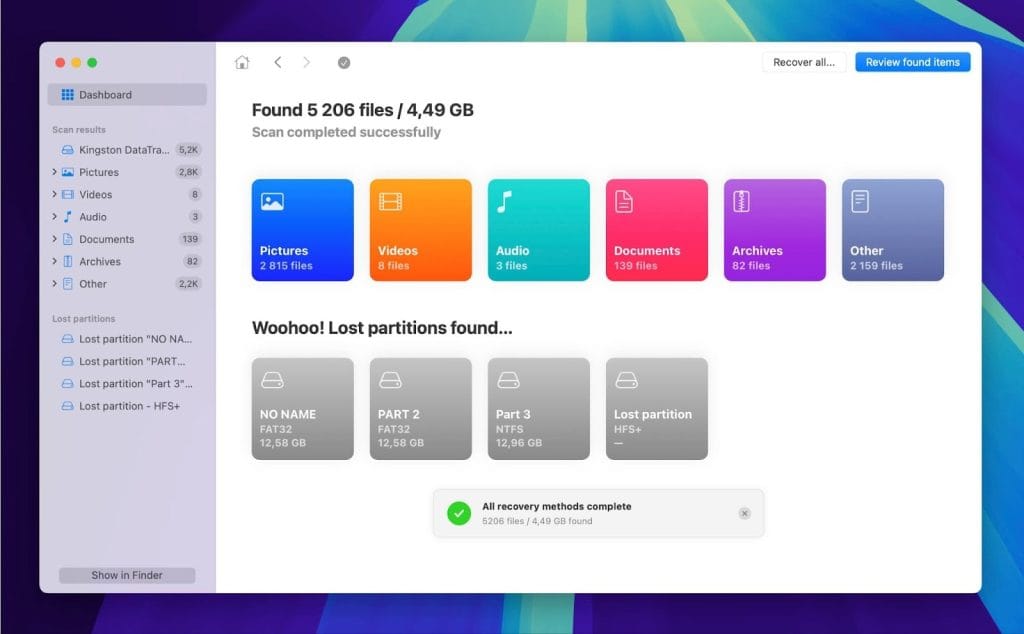
- After installation, Open Disk Drill and select the storage device you wish to scan. Disk Drill supports a variety of devices, including internal and external drives. Click the ‘Search for Lost Data’ button to start the scanning process.

- Allow the scan to complete for a complete overview of recoverable files and to see the chances of successful recovery for each file. Click on ‘Review Found Items’ to see the scanned results. Utilize the sorting options if necessary to find specific files.
- Place checkmarks next to the files you want to recover. Then, click the ‘Recover’ button in the lower right-hand corner of the screen.
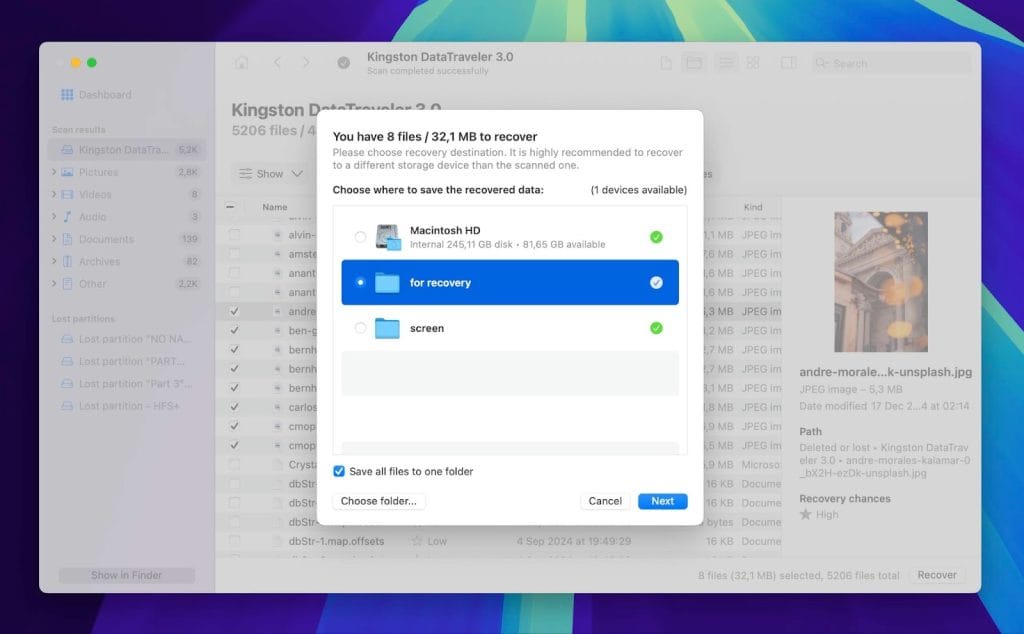
- Choose a recovery destination for the files. Select a different drive than the one from which you are recovering to provide data integrity. Click the ‘Next’ button to finalize the recovery process.
Conclusion
Now you know how and when you can restore deleted files on a Mac using the Terminal. But since these use cases are pretty limited and have easier, graphical alternatives (restoring files from the Trash or from a Time Machine backup directly), we’d say Terminal recovery is more valuable as a learning tool than a go-to method.
As for permanently deleted files without a backup, the Terminal won’t be much help. Any attempt to use it might waste the precious time required for successful recovery using data recovery software, such as Disk Drill or PhotoRec. Just remember, the faster you act, the better your chances of getting your files back. In the end, it’s up to you which method you go with, but now you know your options.